Sunday 30 September 2012

Studies of Structure

Leg and Knee
15 September 2012
Graphite Pencil on Tracing Paper
23cm x 51cm (9" x 20")

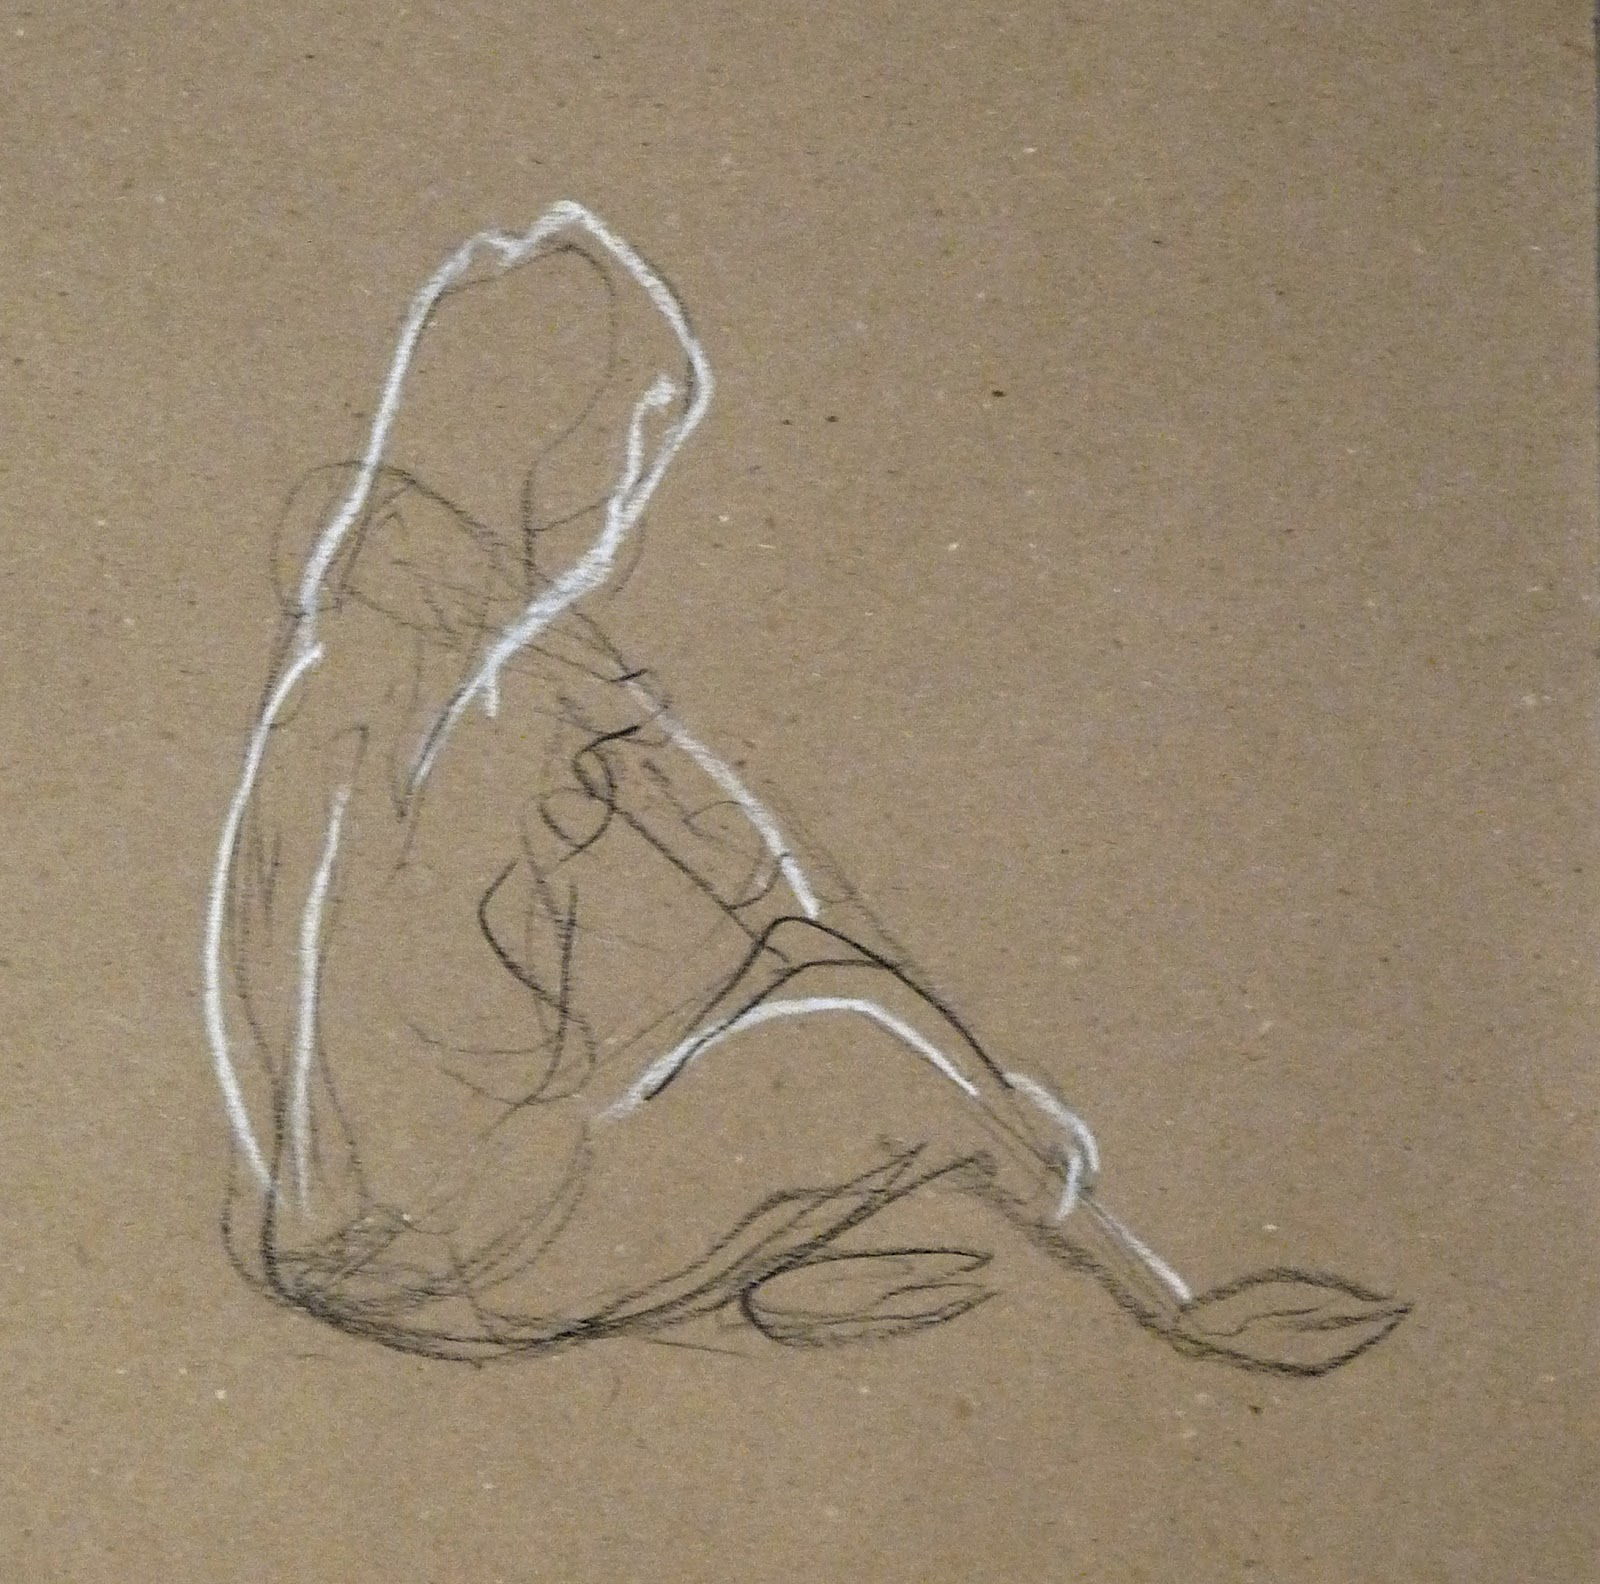
Section 18 of the Natural Way to Draw contains a series of exercises that study the skeletal structure of the body in more detail than the Study of the Bones (see Study of the Bones and Skull and Bones).

The first exercise is a 1 hour study of the Hand and Arm. You start by drawing a 15-minute contour study. You place a piece of tracing paper over the contour drawing and spend the rest of the hour studying and drawing the bones using anatomical charts and text books as references.

There are similar exercises for:
  • The Shoulder Girdle
  • The Leg and Knee
  • The Foot
These exercises are quite different from most of the other exercises in the Natural Way to Draw, which require intense observation of a real subject. During the studies of structure, I spent more time studying Classic Human Anatomy by Valerie L. Winslow than looking at Elaine.

Before starting the exercises, I was unsure about the benefit of drawing the bones - why not just study the anatomical charts for an hour?

The drawing of the Leg and Knee supplies the answer to the question. It helps to identify the gaps in my understanding. By comparing the drawing with the anatomical charts I can see I’ve made the bones far too thick. I’d better pay more attention to this in the next study of the bones exercise.

Eye
15- Minute Contour Study
22 September 2012
Graphite Pencil on Paper
25.5cm x 35.5cm (10" x 14")

The studies of structure also include 15-minute contour studies of ears and eyes. These are more like the majority of the Natural Way to Draw exercises and involve some serious staring.

I have noticed some improvement in my drawings as I learn more about anatomy, but it is a slow process.

Sunday 23 September 2012

Try and Try Again


Sustained Study in Crayon 2 - Modelled Drawing
17 September 2012
Conté Crayon on Paper
46cm x 18cm (18" x 7")

The first sustained study in crayon (see Sustained Study in Crayon) lulled me into a false sense of security. I thought I had made a break through and the rest of the Natural Way to Draw was going to be easy - Silly rabbit.

The second sustained study in crayon started badly. I couldn’t get the relative measurements right in the extended gesture study. Elaine ended up with a pinhead and a strange elongated body.

At the start of the contour study, I made some adjustments, but by the end, the proportions were even worse.

I had to start the modelled study, by making more adjustments. I couldn’t get Elaine’s proportions right, but eventually got them close enough to make the modelling exercise worthwhile. There are still some major inconsistencies, but I quite like the result. It has a quirky charm.

The challenge of drawing this relatively simple pose has forced me to think about techniques for checking the body is in proportion and the various parts are correctly aligned. The Natural Way to Draw describes one system and Classic Human Anatomy by Valerie L. Winslow describes a number of others methods. One thing most of them have in common is they use a body part (normally the head) as a unit of measure.

These techniques are useful when drawing figures from memory or imagination such as in the Daily Composition or The Long Composition. They are also helpful as a reference when drawing from life. You know which parts of the body should be about the same size and you can check their actual sizes using the classic pencil in outstretched arm pose.

Sunday 16 September 2012

The Long Composition

Sandwich Bar
Long Composition - September 2012
Graphite Pencil on Paper
37cm x 28cm (14.5" x 11")

The Long Composition is another exercise from the Natural Way to Draw.

Like the Daily Composition (see Daily Composition and A Year of Daily Compositions), it is a gesture study drawn completely from memory.

The difference between the exercises is that the Long Composition is drawn over multiple days.

On the first day, you visit a location and observe your reaction to it. You start the drawing by making a record of these impressions. On subsequent days, you identify some weaknesses with the drawing, visit the location, study the areas of weakness in more detail and then add what you’ve learnt to the drawing. After a few days of refinement the paper gets messy, so you put a piece of tracing paper over it and continue drawing on that.

Nicolaides instructions are to treat the Long Composition as homework and to complete a drawing every week. I am taking a more relaxed approach by following his alternative suggestion to finish a Long Composition with each Schedule. For me, this translates into 1 drawing every 5 weeks, so each week I am swapping a couple of Daily Compositions for Long Compositions.

The description of the Long Composition answers a question that has been bothering me for over a year – What has this to do with composition? Nicolaides explains the first step in learning composition is to gather material to compose. He stresses a composition should come from an understanding of the subject. You start with the gesture which leads to the composition. You don't impose the so-called rules of composition on to the subject.

So far, I have completed 3 Long Compositions. They have each had their challenges.

Friday Evening at the Royal Oak was my first. The venue seemed ideal because I could study the pub over Elaine’s shoulder without looking too much like a crazy stalker. The trouble is we were drinking a bottle of wine while we were there, which didn’t help my powers of concentration.

Friday Evening at the Royal Oak
Long Composition - July 2012
Graphite Pencil on Paper
39cm x 23cm (15.5" x 9")

My second drawing was In the Kitchen. During the last session, I noticed the perspective on the cooker hob was wrong. I thought about redrawing it, but decided not to because there is a danger I could spend the rest of the course making endless improvements to the same study.

In the Kitchen
Long Composition - August 2012
Graphite Pencil on Paper
39cm x 23cm (15.5" x 9")

I completed Sandwich Bar on Friday. The difficulty with this one was I didn’t have time to study enough details while waiting for my sandwich. This time I noticed mistakes while I was making my final observations and decided not to correct them because it would involve a complete restart.

Next time I need to find a venue where I can sit and watch what’s going on without looking too odd and without drinking half a bottle of wine.

Sunday 9 September 2012

Capturing Light and Negative Painting

Hurst Point Lighthouse
Watercolour on Paper
35.5cm x 15cm (14" x 6")

Hurst Point Lighthouse and Hurst Castle are at the end of 1.5 mile shingle spit, which stretches from Milford on Sea out into the Solent.

They are less than a mile from the Isle of Wight, which provides the backdrop for this picture.

The little blue boat is the ferry between the Hurst Castle and Keyhaven. It has just set off on its way back to the mainland.

Earlier in the summer, Elaine and I visited the castle. We walked out along the spit and returned on the ferry. We used the ferry to add variety to our journey, not because we are idle or were in a hurry to get to the pub for lunch.

I painted the picture at Tony Slater's September workshop for the Shelford Group of Artists. The theme for the day was Capturing Light and Negative Painting. Tony demonstrated how he uses negative painting to create highlights by painting around an object instead of painting the object itself.

There are some elements of negative painting in the picture on this post:

  • I didn’t paint the sails of the boats in the background (you might need to zoom in to see them). I painted the Isle of Wight and the sea around them.
  • The roof of the ferry is just a gap in the grass with a shadow underneath it
  • The right hand edge of the lighthouse is created by the sky and the Isle of Wight.
  • The triangular roof is created by the stuff around it.

Tony started his painting by covering the paper with a pale preliminary wash so that some of the highlights have subtle tints rather than being the stark white of the paper. I used the same technique. The highlights in this painting aren’t white. They are pale pinks and blues, but they look white because of the more intense colours around them.

I didn’t manage the same productivity (4 paintings) as at the Fast and Loose  workshop, but I tried to keep the same spirit of spontaneity in the painting.

Sunday 2 September 2012

Gesture in Black and White

Sitting Holding One Leg - Gesture Drawing
2 September 2012
Conté Crayon on Paper
28cm x 26cm (11" x 10.25")

Section 17 of the Natural Way to Draw introduces the Gesture in Black and White as well as the Sustained Study in Crayon.

The Gesture in Black and White is drawn with black and white Conté crayons on cheap grey construction paper. Each drawing takes a minute or less. The instructions are almost the same as for the original gesture study (see Gesture Drawing), except you start drawing with one crayon and part way through the exercise you switch to the other.

Walking While  Looking At The Clouds - Gesture Drawing
2 September 2012
Conté Crayon on Paper
18cm x 38cm (7" x 15")

I like the idea of the exercise, but I am struggling to get to grips with it. The drawings on this post are more stilted than my gesture drawings in pencil. I need to loosen up.

The main problem is I am thinking too much. Swapping between the crayons is a distraction. Part of my attention is considering when to swap crayons when it should be focused on drawing the gesture.

Bowled Hand - Gesture Drawing
28 August 2012
Conté Crayon on Paper
25.5cm x 27cm (10" x 10.5")

The other problem is the instructions include a mind game. Nicolaides explains the Gesture in Black and White is not an exercise in light and dark. He suggests you will find you draw light areas in white and dark areas in black, but don’t think about it. So as well as thinking about when to swap crayons I am also thinking about whether an area is light or dark and whether to draw it in black or white.

The only solution is to go back to the original instructions. I am going to scribble like crazy for a minute. If I swap crayons and the dark bits are black and the light bits are white, great, but I am not going to waste time thinking about it.

Struggling to Stand - Gesture Drawing
8 August 2012
Conté Crayon on Paper
25.5cm x 27cm (10" x 10.5")